How to Bandage a Cat’s Paw: First-Aid for Cats
When you come across your cat in distress and nursing an injured paw, it can be hard not to panic and immediately whisk your hurt kitty away to the vet. However, many paw injuries can be treated and bandaged at home, saving you the stress, and the cost, of a trip to the vet.
Fortunately, it is not too difficult to learn how to clean and bandage your cat’s paw at home; understanding the process for this important part of cat first-aid can help you out in many situations over the course of your cat’s life, especially if they are an accident-prone feline. In this article, we will discuss common cat paw injuries and the best way to bandage a cat paw.
Why Would a Cat’s Paw Need Bandaging?
Cat paw injuries are typically localized in the footpad. The footpad is the part of the cat’s foot that directly touches the ground; it is thicker and insulates the joints in the foot, protecting them from injury, providing traction when walking or jumping, and cushioning the paw in rough or extremely hot or cold temperatures.
There are several injuries your cat may sustain that can result in their paw needing to be bandaged.
Torn Footpad
The most common paw injury for your cat to sustain is a torn footpad. This can happen if they step on something sharp or if they run across rough terrain. It could also be a result of jumping or falling off of precarious areas.
A torn footpad is characterized by a cut in the pad that does not have any type of foreign object or splinter in it.
Burnt Footpad
Burnt footpads can occur when your cat is outside in extremely hot temperatures. They can also happen if your cat decides to jump up on a hot area on your stove or walks across chemical substances. Additionally, very cold, icy, or ice and salt-covered surfaces can cause burn injuries.
A burnt footpad will not have any open cuts, but it will have redness, singed hair, swelling, and blisters. If any of the skin on your cat’s footpad has turned black, this is a third-degree burn and must be dealt with by a vet to prevent infection.
Foreign Object Injury
Sometimes your cat may return home limping or hopping, making an effort to keep all their weight off of one foot. This is commonly caused by a foreign object becoming lodged in their paw, leading to pain or cuts, if the object is sharp enough.
Before attempting to treat your cat, you should take a look at their paw and ensure that the foreign object is not too deep in their paw; if it is, you will likely need to take a trip to the vet for removal.
Bandaging Versus a Splint
When treating your cat’s paw injury, you may be wondering if you need to use a splint instead of a basic bandaging method. Fortunately, you will not need to add a splint to your cat’s bandage; splints are reserved for keeping broken bones straight and will not be helpful when it comes to treating a cat paw.
How to Bandage a Cat Paw
You can follow this simple guide if you need help bandaging your cat’s paw.
Materials Needed for Bandaging a Cat Paw
Before bandaging your cat’s paw, make sure you have all of the materials you need within easy reach, so you can complete the process as fast as possible. You will need:
- Gauze pads
- A bowl filled with cool water
- A clean cotton pad or towel
- Some type of self-sticking medical tape
Step by Step Guide to Bandaging Your Cat’s Paw
If your cat tends to struggle, you may want to consider getting a helper or wrapping your cat up securely in a towel, before starting, leaving just their head and injured paw out.
- Bring your cat into a bathroom or other small, enclosed area. Make sure you have all of your bandaging materials easily accessible.
- Gently grab hold of your cat’s injured paw and lightly swirl it in a bowl of cool water. This will clean the wound and dislodge any dirt.
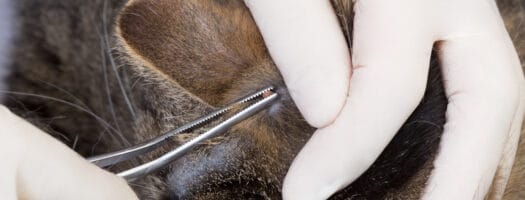
- If your cat has a foreign object injury, take a pair of tweezers and gently remove the object, repeating the cleaning step once it is out.
- Once the wound is clean, lightly dab a cotton pad or clean cloth on it, removing the rest of the dirt. For burn wounds, you should not rub or scrub at the injury. For torn footpads that are bleeding, apply pressure to the wound until it stops, and then clean it again.
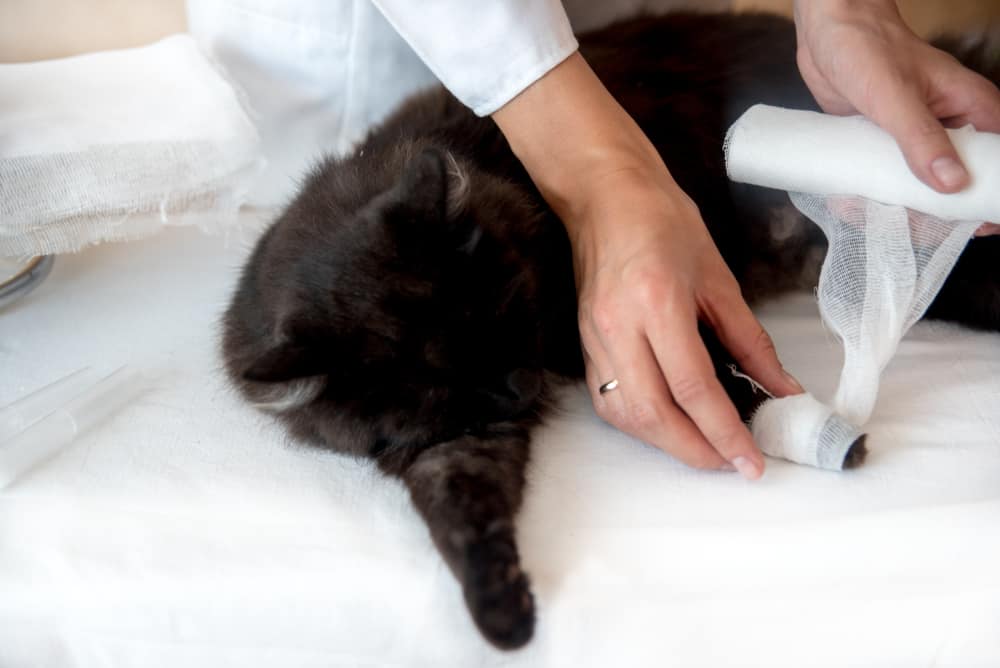
- Apply a few gauze pads to the bottom of the clean paw, cushioning the injury and preventing any blood from escaping.
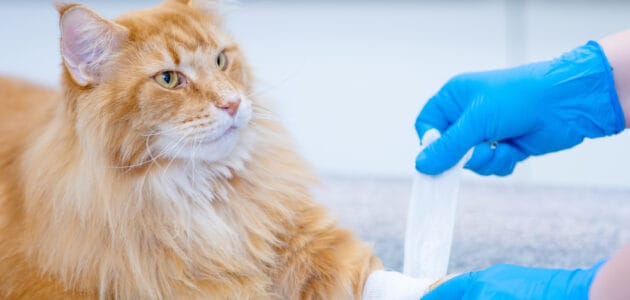
- Wrap your self-sticking tape around the gauze, starting at the bottom of the paw and looping it around until you are above the ankle joint to prevent slipping.
Once the bandage is fully applied, check it for tightness. You should be able to insert two fingers between the bandage and your cat’s leg. If it is too tight, unwrap the bandage and try again.
The injury may bleed a little as soon as your cat tries walking on their foot, but this shouldn’t be a concern unless the bleeding goes on for more than a few days or is regularly soaking through the bandage.
When Should You See a Vet About Your Cat’s Paw?
When you initially evaluate your cat’s paw, you should be checking to see if there are any foreign objects lodged deeply below the skin, any type of large blister or black skin, or an extremely deep cut that doesn’t stop bleeding after 10 to 15 minutes. In any of these situations, you are probably not able to treat the paw at home and should seek veterinary care as soon as possible.
Other reasons to see a vet include if the paw doesn’t seem to be healing, or if you believe your cat is developing an infection in their paw.
Checking for Signs of Infection
These signs of infection are very important to be able to recognize; if an infection in your cat’s paw goes untreated, it could lead to an even more serious injury or become potentially fatal.
- Lethargy: If you notice your cat laying around and being reluctant to move, they could have an infection.
- Fever: Signs of a cat fever include refusal to eat, move, drink, shivering, or decreased grooming.
- Foul Odor: A strong, foul smell coming from the wound indicates the presence of bad bacteria.
- Swelling: This could occur on the injury itself or in the surrounding area.
- Discharge: Any kind of pus or discharge from the injury itself suggests an infection.
If you notice your cat displaying any of these symptoms, you should take them to a vet as soon as possible. They will probably need antibiotics and maybe fluids in order to properly treat the infection and their original injury.
How Long Will a Cat’s Paw Take to Heal?
Depending on the cat and their level of activity, it should take between 10 and 28 days for your cat’s paw to fully heal. During this time, they will have limited mobility and should be encouraged to stay inside and rest as much as possible to speed up recovery.
You should not encourage your cat to play to roughly or allow them to lick or chew at their bandage, as this can slow down the healing process.
How Often Should You Change the Bandage?
You should be changing your cat’s bandage at least once a day. Every time you change it, give the wound a quick cleaning and check for any sign of infection.
Keep in mind that litter or other environmental factors, such as water or dirt, could get into the bandage, meaning that you have to change it more often. Try to align your bandage changes with the time after your cat uses the litterbox or comes back from a walk to prevent too many stressful bandage changes.
Stopping Your Cat From Destroying Their Bandage
Unfortunately, cats don’t always take kindly to having their paw wrapped up in a bandage. If your cat is continually fussing with their paw, try out these tricks to prevent them from removing the bandage.
Anti-Lick Spray
If your cat is always licking or chewing on their bandage, you can invest in an anti-lick spray. These products are usually made out of bitter fruit extracts and are completely undesirable for your cat to lick; a few sprays and they should avoid chewing on their bandage.
Baby Socks
An especially adorable protective measure, a baby sock is just the right size to place over your cat’s bandage and stop them chewing at it. It will also protect the bandage from any environmental wetness or roughness that could ruin the bandage.
However, you may also need to use medical tape to keep the sock in place as your cat moves around.
Plastic Coverings
A plastic covering like cellophane or even part of a plastic bag can prevent water from getting into your cat’s bandage and can stop your cat from licking at it.
On the downside, plastic coverings are easy for cats to rip apart with their teeth or other paws, and may not be the best choice for a determined cat.
Elizabethan Collar
Often referred to as the “cone of shame,” an Elizabethan collar is one of the best solutions to prevent bandage licking and chewing. The cone will stop your cat from being able to reach their paws to interfere with the bandage.
If you are not a fan of larger, plastic-cone collars, you can invest in a cloth, donut-shaped collar that will have the same effect, and may even be more comfortable for your cat.
Preventing Future Paw Injuries
While it isn’t possible to keep an eye on your cat every single moment, there are some steps you can take to prevent future paw injuries.
If your cat is an outside cat, you should try to supervise them when they leave your home. This will allow you to monitor where they are going and stop them from getting into any potentially dangerous areas. For cats that enjoy a closed-in garden, you should make an effort to check the ground regularly for any sharp rocks or jagged wood.
Indoors, cats have a much lower risk of sustaining a foot injury, but you should still take care to clean any broken glass or spilled chemicals immediately and train your cat not to walk near hot surfaces like stoves and fireplaces.
Giving Your Cat the Care They Need
Once your cat has a paw injury, the best thing you can do for them is investigate the severity of it. If it isn’t too serious, you can put your first-aid training to use and bandage their paw, keeping an eye on the injury until it heals.
Remember to look for signs of infection and regularly change the bandage, and your cat will be feeling like themselves in no time!