The 10 Best Cat Nail Clippers to Buy in 2026
Trimming your cat’s nails is a necessity, but it’s an activity that both cat and owner often seem to dread. For some owners, nail trims are such a nightmare that they prefer to let the vet take care of it. For those who are brave enough to clip their cats’ nails themselves, it’s important to have a quality tool. A good tool will expedite the process so that it’s over before your cat even realizes it.
We’ve researched the best cat nail clippers and created a comprehensive guide for you so that you’ll have everything you need to safely trim your kitty’s nails at home. But first, let’s talk about the different types of nail-trimming products available on the market and identify their important features.
- Factors to Consider When You Buy Cat Nail Clippers
- Top 10 Best Cat Nail Clippers 2026
- 1. Best Overall Clippers: Shiny Pet Nail Clippers
- 2. Best Premium Clippers: Casfuy Nail Grinder
- 3. Best Budget Clippers: JW Gripsoft Cat Nail Clippers
- 4. Best Plier-Style Clippers: Epica Professional Pet Nail Clipper
- 5. Best Small Clippers: Pet Republique Cat Nail Clippers
- 6. Easiest-to-Use Clippers: JOFUYU Nail Clippers for Small Animals
- 7. Most Durable Clippers: H&H Pets Cat Nail Clippers
- 8. Best for Avoiding Over-Trimming: Safari Professional Stainless Steel Nail Trimmer
- 9. Most Lightweight Grinder: Dremel 7300 Pet Nail Grinder
- 10. Safest Clippers: BOSHEL Nail Clippers
- Cat Nail Clipping 101
- Final Thoughts
Factors to Consider When You Buy Cat Nail Clippers
As you probably know, there are a few different types of nail care devices on the market, so we’ll take a moment to talk about the advantages and disadvantages of each and then get into the overall features you’ll want to look for.
Types of Nail Care Devices
Devices to shorten your cat’s nails come in a few different styles: pliers, scissors, guillotines, and grinders. The first three cut the nails, whereas the last, as the name suggests, grinds the nails down.
We’ll go over them briefly here; for an even more in-depth look at the types, check out our detailed guide below.
Pliers
As their name implies, these nail clippers are very similar to actual pliers (though these have blades). They’re typically easy to use, especially for thicker nails, but they can be rather difficult to use on smaller cat nails.
Scissors
These clippers look like very small scissors, and they make it very easy to cut exactly where you mean to. However, these often don’t work on thicker nails, and they can be uncomfortable to use if you have larger hands.
Guillotine
Guillotines are clippers with a blade that comes out when you squeeze the handle. While their sharp blades can easily cut through your cat’s nails, they’re also tricky to use and can injure a squirming cat. For that reason, we’ve decided to leave guillotines off of our list.
Grinders
These aren’t technically nail clippers; instead, they’re electric-powered rotating files that grind away your cat’s nails. They’re a great option if you want to avoid cutting your cat’s quick; however, the noise of a grinder can sometimes unsettle skittish cats. While they’re less likely to hurt squirming cats than other options, there are a few safety risks, which we explore below.
Important Features of Cat Nail Clippers
Though the styles of these nail care devices are a bit different, there are some features you’ll want to look for while shopping.
Grip
It’s important to have a comfortable, firm hold on your tool to prevent accidents. Many nail care devices make use of rubber or ridges to keep your hands from slipping. When tools feel awkward in your hands, it can be harder to get the job done, so it’s important to find something that feels good and fits well in your hand.
Blades
Sharp blades are important to avoid splintering the nails which can weaken them and lead to hangnails. A sharp blade will also reduce the amount of force you need to use to cut through the nail, making the process quick and easy.
It’s also vital for blades to be firmly held together, as loose blades won’t cut precisely and can leave nails splintered. A loose blade may cause the nail to turn as it cuts instead of cutting cleanly through. This can make the experience even more unpleasant for your cat.
Bit and Cap
When it comes to nail grinders, you’ll be considering the bit and cap rather than the blades. You want a bit that is gentle to the touch but still gets the job done. It’s often helpful when a product comes with a cap. The cap is typically removable and has a couple of different sized openings for the nail; it covers the rest of the bit so it won’t rub against your cat’s paws.
Versatility
If you have other pets that you need a nail clipper for, take into account the size and shape of the tool. Could it be used on your other pets? Scissors tend to be good for small animals like rabbits, guinea pigs, chinchillas, ferrets, and even birds like parrots, whereas pliers are a bit more heavy-duty and can cut through thicker nails, like those belonging to dogs. Having a clipper that can be used on your other pets as well is convenient and saves money.
Safety Features
Some products come with safety features like guards (also called safety stops) and locking blades to help prevent accidents. Though you will still need to practice caution, safety features can take away some of the stress of a nail trim.
Now that you know what to look for in a nail clipper for your cat, let’s jump into the best options that we found for you and your furry best friend.
Top 10 Best Cat Nail Clippers 2026
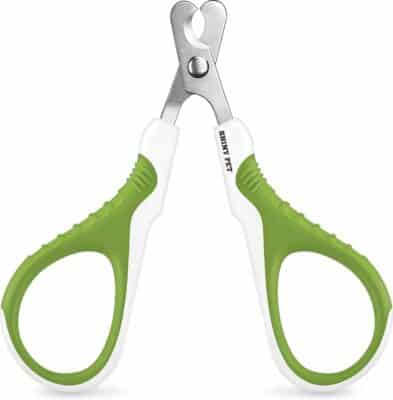
1. Best Overall Clippers: Shiny Pet Nail Clippers
Editor’s Rating:
Why we like it: Despite being scissors, these clippers were made to accommodate big hands. The blades cut quickly and cleanly and are set at a 20-degree angle, making it easy to see where you are trimming.
Quick Facts:
- Type: Scissors
- Versatility: Small animals, toy breeds
Grip
These clippers were designed to be ergonomic and, as a result, are comfortable to grip in the hands. They are also lightweight and non-slip.
Many of these scissor-style clippers are made too small to be comfortable for large hands, but Shiny has designed their scissors with wider openings to accommodate big hands. These were also made to work for both left-handed and right-handed people.
The handles are made out of plastic and rubber; unfortunately, the plastic can hit together and make a clicking sound when you’re cutting. This may scare your cat, especially if she is already uncomfortable with getting her nails done.
Blades
The Shiny Pet nail clippers are super sharp and will cut through your cat’s nail easily without any splintering. The stainless steel blades are at a 20-degree angle which makes it easier to see where you’re cutting. Though it isn’t the end of the world if you trim a little of your cat’s toe hair, these scissors are easy to maneuver around the paws so you won’t have to worry about it.
Versatility
These clippers are the perfect size for any small animal. They can take on the nails of guinea pigs, rabbits, ferrets, chinchillas, and even parrots. If you want to use these on a dog, be aware that they’ll only work on toy breeds. If you’d like something that works for cats and larger dogs, consider the Casfuy Nail Grinder instead.
Safety Features
The Shiny Pet nail clippers don’t have any particular safety features because they are scissors. However, the angle of the blades makes it easy to see exactly where you’re cutting. They’re also a bit tight when it comes to opening and closing, so the blades will stay in place until you’re ready to cut.
Other Notable Features
The packaging of these clippers has a QR code that you can scan for helpful instructions on how to use the product to clip your cat’s nails. Not only that, but Shiny Pet is so confident in these nail clippers that they offer a lifetime money-back guarantee. If you’re ever dissatisfied, you can contact the company to request a replacement or a refund.
Pros
- Sharp blades for quick, clean cuts
- Can be used on any small animal, not just cats
- The angle of the blades makes it easy to see where you’re cutting
- Handles aren’t too small for large hands
Cons
- Plastic handles click together after cutting which may scare some cats

Editor’s Rating:
Why we like it: This nail grinder is perfect for nervous cat owners with squirmy cats. It’s safe, effective, and comes with a protective cap. It can even be used while it’s charging!
Quick Facts:
- Type: Grinder
- Versatility: Small animals, dogs
- Quiet motor (under 50 dB)
- Long battery life + rechargeable (can be used while charging)
- Two speed settings: high and low
Grip
Casfuy designed this grinder to be ergonomic, so it is comfortable to hold regardless of whether you are right or left-handed. It’s easy to maneuver around your cat’s paws and can be used at any angle. This is great if you prefer to sneak attack your cat’s nails while she’s asleep.
Bit and Cap
This nail grinder uses a diamond drum bit which results in a delicate but effective experience. In fact, you may be able to finish your cat’s nails in minutes (though this depends on how cooperative your cat is). Because this is a grinder, you won’t have to worry about it chipping the nails.
You can use this tool with or without the cap, but the cap does provide a smaller opening while covering the rest of the head so that the grinder won’t be hitting any other part of your cat’s paw. Compared to the other tools on this list, this grinder (both the bit and the body) may seem too large for your cat; despite its size, it can certainly get the job done.
Versatility
You may think this tool looks too big to use on small animals other than cats, but it isn’t! It can be used to grind the nails of animals like rabbits, ferrets, guinea pigs, and parrots. It also works on dog nails.
Safety Features
Being a grinder, this product is already quite safe as it cannot cut anything. However, the cap on this product does provide some measure of safety as it can help prevent hair from getting wrapped around the bit.
Pros
- Ergonomic and comfortable to hold
- Easy to maneuver and can be used at any angle
- Can be used on almost any animal
Cons
- May take longer than cutting the nails
- Expensive
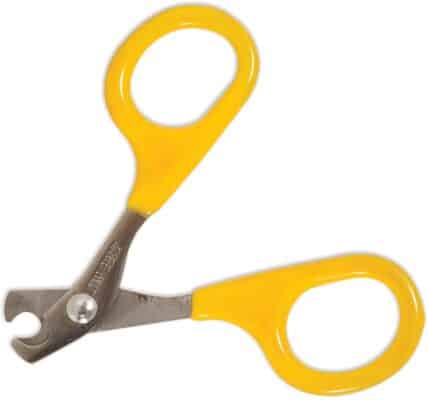
3. Best Budget Clippers: JW Gripsoft Cat Nail Clippers
Editor’s Rating:
Why we like it: These clippers are truly a steal. Despite being cheap, they have sharp, capable blades and rubber handles that provide a comfortable, sturdy grip.
Quick Facts:
- Type: Scissors
- Versatility: Small animals, toy breeds
Grip
The rubber grip on these clippers is soft, comfortable, and keeps them from slipping around in your hands. However, these clippers are rather small, and people with big hands may find them difficult or awkward to use. If you have large hands, you may want to check out the Epica Professional Pet Nail Clippers, since they’ll be more comfortable to hold.
If your cat has a habit of hiding the nail trimmers (or you tend to misplace them yourself), the bright yellow color of the grips makes them easier to find.
Blades
The JW nail clippers have sharp blades that cut through cats’ nails quickly and cleanly. The small size makes them maneuverable, and it’s easy to see exactly where you’re cutting.
Versatility
Aside from cats, the JW clippers work best on small animals like rabbits, guinea pigs, and chinchillas. They’re too small for most dogs, especially considering that dogs tend to have thicker nails. However, they can be used on toy breeds.
Safety Features
Being scissor-style clippers, these nail trimmers do not have any safety features. However, this doesn’t mean that cutting your cat’s nails has to be a risky ordeal. Be sure to scroll down and read our guide on how to safely cut your cat’s nails.
Pros
- Affordable
- Sharp blades cut quickly and cleanly
- Easy to maneuver
- Great for cat owners with other small animals
Cons
- Too small for large hands
4. Best Plier-Style Clippers: Epica Professional Pet Nail Clipper

Editor’s Rating:
Why we like it: These clippers cut like a knife through butter. They’re easy to hold, work on a variety of animals, and have safety features.
Quick Facts:
- Type: Pliers
- Versatility: Small animals, small and medium-sized dogs
Grip
The Epica nail clippers have ridges and a rubber coating to provide a firm, sturdy grip. Being a plier-type, it is comfortable and easy to hold regardless of whether you have large or small hands. Similarly, it doesn’t matter if you are right or left-handed.
Blades
Sharp blades are incredibly important for nail clippers, and Epica definitely delivers. The blades on this cut like a knife through butter, which means you can finish trimming the nails quickly enough that your cat may decide to spare your life.
The sharp blades also mean you won’t need to use a lot of pressure to get through the nail, and cuts will be even and clean. No splintered nails or hangnails here! Not only that, but these blades are held together with a screw and washer, so you can tighten them yourself if you feel that they’ve gotten loose.
Versatility
You’ll want to purchase the “Small/Medium” size of this clipper for your cat as the large can be a bit harder to maneuver around slim nails. If you have a dog, this tool will work for her too as long as she isn’t a large breed. The Epica nail clippers can also be used on small mammals like guinea pigs and rabbits.
Safety Features
Since these clippers are a plier-type, they come with locking blades and a safety guard. The safety is set to cut ⅛ of an inch of nail, so keep that in mind when trimming. If you want to cut more or less than that, you can move the guard out of the way.
The guard on this product can sometimes be difficult to move, which can be remedied by loosening the bolt holding it in place. It also runs along a track so you cannot cover the entirety of the blades’ opening with it. This is a bit awkward, but it does still function.
Other Notable Features
The overall design of this product makes it easy to see where you are cutting so you won’t have to worry about cutting off more nail than you planned.
Pros
- Sharp blades result in clean cut
- Can be used on animals other than cats
- Safety guard helps prevent overcutting
- Blades can be tightened at home when needed
Cons
- Safety guard does not cover the entire opening behind the blades
- Safety guard can be difficult to move
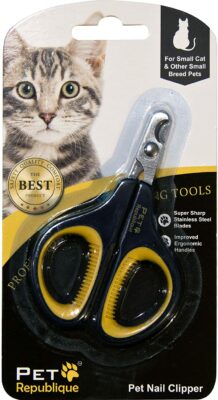
5. Best Small Clippers: Pet Republique Cat Nail Clippers
Editor’s Rating:
Why we like it: At an affordable price, these clippers make quick work of your cat’s claws. Not only that, they come with a four-year warranty and Pet Republique donates 15% of proceeds to charity.
Quick Facts:
- Type: Scissors
- Versatility: Small animals, possibly toy breeds
Grip
These scissors have rubber around the inside of the handles for a non-slip grip. The overall design is intended to be ergonomic and is comfortable to use. It also doesn’t matter whether you’re right-handed or left-handed as these clippers can be used by both.
Though comfortable for most, those with larger hands may find their fingers feeling a bit squished in these scissors.
Blades
The blades on these scissors are sharp enough to make quick work of your cat’s nails, without any splintering.
Pet Republique is so confident in the sharpness of their blades that they offer a four-year warranty. They promise that their blades will stay sharp for years and that the product as a whole will not fall apart.
Versatility
Due to the size of this clipper, it wouldn’t be a good option for a cat owner who also wants to use it on a dog. It may work on toy breeds like chihuahuas, but it overall isn’t the best option. When it comes to small mammals, however, the Pet Republique nail clipper is up to the task. It’s the perfect size for clipping rabbit, chinchilla, or guinea pig nails. For an option that works on dogs as well, check out the Casfuy Nail Grinder instead.
Safety Features
Because these clippers are scissor-style, they do not have any safety features like a guard or locking blades. However, the blades are made to be tight so that they cannot easily flip open. This may make it harder to cut nails on a squirmy cat, but can otherwise be helpful. Because the blades are tight, you can line them up where you want them, and they won’t move until you execute your cut.
Other Notable Features
Aside from the four-year warranty, Pet Republique also donates 15% of their profits to the American Animal Rescue Society.
Pros
- Clippers come with a four-year warranty in case product falls apart or blades dull
- Easy to maneuver
- Great for other small animals
- Made for both right-handed and left-handed people
- 15% of profits are donated to an animal charity
Cons
- May be uncomfortable to hold if you have large hands
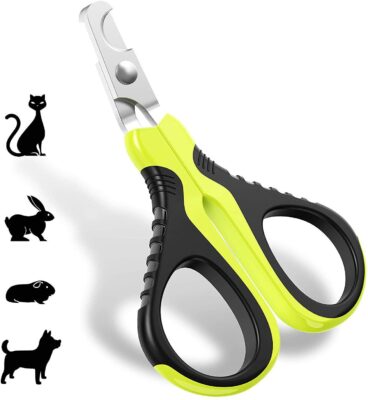
6. Easiest-to-Use Clippers: JOFUYU Nail Clippers for Small Animals
Editor’s Rating:
Why we like it: The blades of these clippers are set at a 20-degree angle, making it easy to see where you're cutting. They’re maneuverable and even come with a nail file for touch ups.
Quick Facts:
- Type: Scissors
- Versatility: Small animals, puppies, small dogs
Grip
The handles of the JOFUYU nail clipper are easy to hold and coated in a non-slip material to help prevent accidents. The grip makes it easier to maneuver, especially if you’ve got to act fast when your squirmy cat suddenly wrenches her paw away.
Due to the size of these clippers, however, they may be awkward or uncomfortable in large hands. On the bright side, these scissors will work for both right-handed and left-handed people.
Blades
The stainless steel blades on these scissors are durable and sharp. They provide a clean cut without pulling or tugging on the nails. They slice right through, just like your cat’s dagger-like nails on your skin (until you trim them, of course).
The blade is set at a 20-degree angle, which makes it easier to see exactly where you’re cutting so you can avoid the quick.
Versatility
As you can probably tell by the size of this product, it isn’t going to be the right choice for large dogs. For that, you can consider the Casfuy Nail Grinder. However, it will work for small breeds and puppies. If you own any small animals like rabbits, guinea pigs, chinchillas, ferrets, or the like, then this will be a great option for all of your pets.
Safety Features
Though this doesn’t have locking blades or a safety guard, the maneuverability and ease of use helps prevent accidents. Furthermore, when the scissors are closed the blades are inaccessible, though you may still want to keep this out of reach of children.
Other Notable Features
This nail clipper comes with a file, so if your cat is patient enough, you can make sure her nails aren’t left with any sharp edges.
JOFUYU also offers a lifetime satisfaction guarantee, though they don’t provide any further details. Presumably, if you buy the product from JOFUYU on Amazon, you’ll be able to contact them and get a replacement or refund if anything goes wrong.
Pros
- Angled blade makes it easy to maneuver and see where you’re cutting
- Sharp blade for quick, clean cuts
- Comes with a file
Cons
- May be uncomfortable in large hands
- Lifetime satisfaction guarantee is vague
7. Most Durable Clippers: H&H Pets Cat Nail Clippers

Editor’s Rating:
Why we like it: These clippers have sharp stainless steel blades that are protected by a three-year warranty. Also, H&H Pets donates 15% of profits to animal rescue organizations.
Quick Facts:
- Type: Scissors
- Versatility: Small animals, toy breeds, small dogs
Grip
The non-slip coating on the H&H Pets nail clippers provides a secure grip and feels comfortable in the hand. Due to its ambidextrous design, this product will work for you whether you’re right-handed or left-handed. Like many nail scissors, people with big hands may find this product to be too small for them.
Blades
The blades on this nail clipper are made of stainless steel, so they are durable and immune to rust. The sharp blades make quick work of your cat’s nails, so you might be able to walk away from the nail clipping session unscathed. Your cat will walk away with cleanly-cut, hang-nail free claws that no longer catch on carpets and furniture.
Versatility
The H&H Pets nail clippers are perfect for all types of small animals. If you’re a cat owner who also has a bunny, guinea pig, ferret, or the like, these clippers will work for their nails, too. As you can imagine, these are a bit small for dogs, but they can be used on diminutive breeds like pugs.
Safety Features
Though these clippers don’t have any features like a safety guard or locking blades, their design makes them easy to maneuver around your cat’s paws. You’re able to see exactly how much nail you’re taking off, making the process much safer.
Other Notable Features
H&H offers a three-year warranty on this product, which you can register on their website, but they don’t provide any details on exactly what is covered. If you like supporting animal rescues, then you’ll be happy to know that 15% of H&H’s profits are donated to animal rescue organizations.
Pros
- Easy to maneuver
- Sharp blades
- Works well on a number of small animals
- 15% of profits are donated to animal rescue organizations
Cons
- May be too small for big hands
- No information on what the included warranty covers
8. Best for Avoiding Over-Trimming: Safari Professional Stainless Steel Nail Trimmer
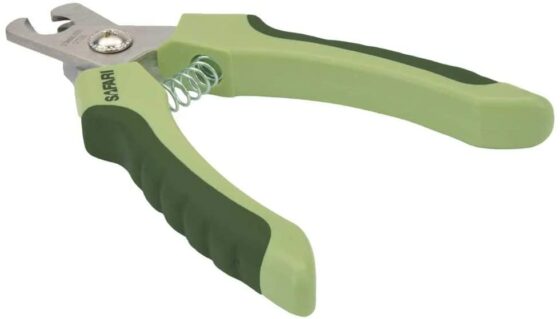
Editor’s Rating:
Why we like it: The Safari clippers are durable due to their stainless steel blades and overall design. They cut cleanly and have a safety-stop to prevent over-trimming.
Quick Facts:
- Type: Pliers
- Versatility: Small animals, small and medium-sized dogs
Grip
These nail clippers have rubber-coated handles to provide a sturdy grip. Though the design is generally comfortable, people with large hands may find the product to be a bit too small and thus awkward in the hand.
Safari does offer a larger size of this clipper, but the tradeoff is that the blades will be bigger. This may make it difficult to cut small cat nails with precision.
Blades
Safari uses stainless steel blades that are just as sharp as your cat’s claws of death — before you trim them, that is. This means a clean cut through the nail without any crushing or splintering. They are held together with a screw and a washer, making them easy to tighten should they ever come loose.
Versatility
Being a plier-type trimmer, the Safari clippers are best for cats and small to medium-sized dogs. However, in a pinch, they can be used on smaller animals like rabbits.
Safety Features
The Safari Professional Nail Trimmer can’t keep you safe from your cat’s vengeful claws during a trim (but a towel might; check out our guide below!), but they do have a safety guard to prevent over-trimming.
Safety guards aren’t foolproof though, so remember to avoid cutting the pink part of your cat’s nail. Though the guard can be helpful, it does tend to flop around a bit, so be sure it’s exactly where you want it before going in for a cut.
Like most pliers, the blades on this trimmer can be locked shut when not in use.
Pros
- Sharp blades cut without splintering
- Comfortable, non-slip grip
- Blades can be tightened at home
- Can also be used on dogs
Cons
- Small size may feel awkward in large hands
- Safety guard moves too easily
9. Most Lightweight Grinder: Dremel 7300 Pet Nail Grinder
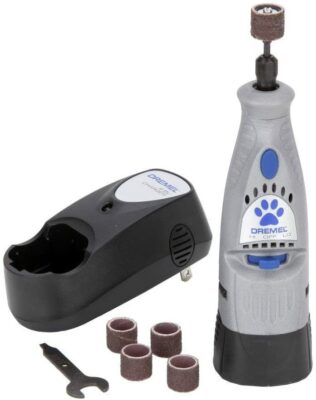
Editor’s Rating:
Why we like it: The Dremel grinder is lightweight and comes with extra bits. The 60-grit sanding drum effectively grinds down nails.
Quick Facts:
- Type: Grinder
- Versatility: Small animals, dogs
- Quiet motor
- Rechargeable battery
- Two speed settings: 6,500 and 13,000 RPM
Grip
The Dremel grinder has a completely plastic body with some texture to it, and while it isn’t difficult to grip, it could be improved with rubber or another non-slip coating. Luckily, it’s lightweight, so while you may tire of holding your cat down, you won’t tire of holding the Dremel.
Bit and Cap
Unlike the Casfuy grinder on our list, Dremel does not come with any cap. Some people prefer not to use the cap anyway, but it’s nice to have the option. It does, however, come with five extra bits.
The bits are 60-grit sanding drums that make quick work of your cat’s nails (though perhaps not as quick as clipping). The nails are left smooth and dull so your furniture can survive another week.
Versatility
Like most grinders, the Dremel can be used on many different animals, not just cats. It works on dogs, birds, and small mammals like rabbits and guinea pigs.
Safety Features
Dremel makes a number of power tools, and it is not uncommon for people to use some of Dremel’s other rotary tools on their pets’ nails. However, those tools are not meant to be used on animals and are too high powered.
This version of the tool, specifically made for the pet, has kept the available speed options at 6,000 and 13,000 RPM. These speeds are fast enough to grind the nails down but will not hurt your pet should the tip touch any other part of their bodies.
Other Notable Features
The battery life on this tool isn’t the best. It will last long enough for you to finish a nail trimming session, but it is recommended that you always recharge it after you’re done. Unlike the Casfuy grinder, the Dremel cannot be used while it is charging.
Pros
- Comes with replacement bits
- Lightweight
- Can be used on many animals
Cons
- Takes 3 hours to charge the battery and can’t be used during charging
- Doesn’t come with a cap
10. Safest Clippers: BOSHEL Nail Clippers
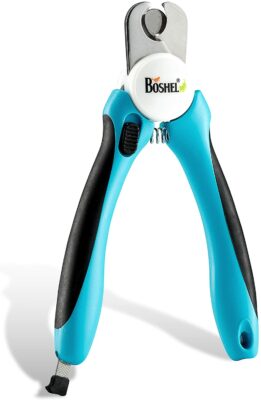
Editor’s Rating:
Why we like it: The BOSHEL nail clippers have the lovely safety features common to pliers while also including a nail file in the handle.
Quick Facts:
- Type: Pliers
- Versatility: Small and medium-sized dogs
Grip
The Boshel nail clippers boast an ergonomic handle. The grip is soft and non-slip to help prevent accidents. Though the grip is overall slip-resistant, it does lack the ridges of other similar models, like the Epica nail clippers on our list.
Though this tool can definitely be used on cats, it is a bit big. For some, the size may make it a tad tricky to maneuver, especially with a finicky cat. If you prefer a smaller instrument, you might want to check out some of the scissor-type clippers on our list, like the Shiny Pet nail clippers.
Blades
The blades are made of stainless steel, which means they are sharp, durable, and immune to rust. These Boshel clippers are sure to cut through your cat’s nail quickly without crushing or splintering it.
Versatility
If you’re looking for something to use on both your cat and your dog, look no further. These clippers are great for small to medium-sized dogs. They’re too big to use on smaller animals like rabbits or guinea pigs, though.
Safety Features
The blades on the Boshel nail clippers can be locked shut when not in use. They also have a safety stop to help you avoid cutting the quick of your cat’s nails. The guard is set to cut ⅛ inch of nail and cannot be adjusted to be any shorter. Of course, you can move it out of the way and cut less if ⅛ inch is too much.
Other Notable Features
Boshel was nice enough to include a nail file in the handle of this clipper. Sometimes, clipping a cat’s nail will remove the point, but you may still find the edges of the nail to be a bit sharp. This is where a nail file can be helpful. If your cat will allow it, that is.
Pros
- Comes with a file in the handle
- Stainless steel blades are sharp, durable, and cut cleanly
- Also great for cutting dogs’ nails
Cons
- Large size may make it difficult to maneuver around paws, especially if the cat is squirmy
- Expensive
Cat Nail Clipping 101
Some cats are great with having their nails clipped; others, not so much. Whichever type of cat you have, being knowledgeable about nail clipping can keep the experience as stress-free as possible.
Therefore, we’ll be providing information about why you should trim your cat’s nails, how to do it, what to do about uncooperative cats, and other tips and tricks. While you may already know some of this stuff, hopefully you’ll come away with an even greater understanding of all things related to kitty nail trims.
Why Should You Trim Your Cat’s Nails?
As a cat owner yourself, you may already know exactly why you should clip your kitty’s nails regularly. Still, let’s go over some of the main reasons for trimming:
- Long nails can be uncomfortable for your cat and catch on objects like rugs and furniture, impeding movement.
- Sharp nails can cut your skin (ouch!) and potentially cause Bartonella, or “cat scratch fever.”
- Sharp claws can damage furniture.
- Declawing is detrimental to your cat’s overall health and well-being, and thus is not a solution for the above issues.
I don’t think we need to explain why you don’t want your cat scratching you or your furniture. However, it is important to explain the dangers of declawing and the health risks that razor-sharp claws can pose.
Cat Scratch Fever
Cat scratch fever or cat scratch disease is formally known as Bartonella and is caused by a bacteria called Bartonella henselae.
Symptoms include fever, enlarged lymph nodes, and a scab or pustule on the scratch. You can get cat scratch fever even if your cat appears to be healthy because some cats will not show any signs of having Bartonella.
Cat scratch fever is transmitted to you primarily via scratches (hence the name), but cats get it from fleas. This disease isn’t very common, but you can further reduce your risk by keeping your kitty up to date on her flea prevention and trimming her nails regularly.
Is Declawing a Good Option?
Declawing the cat used to be a common practice, but cat owners are becoming more and more educated about their fur babies’ health.
There are three methods commonly used to declaw cats: amputation, laser surgery, and tendonectomy. We’ll spare you the grotesque details of how each of these work and instead share an analogy: declawing a cat is akin to cutting a human’s fingers off at the last knuckle. It serves no beneficial purpose to the cat and instead has negative consequences.
These consequences can include pain in the paws, back pain, infection, lameness, and tissue death. Some cats may also begin to bite as they no longer have claws to defend themselves with.
Declawing changes the very nature of a cat’s foot, which means the foot will meet the ground differently. This is what causes long-term pain and back problems.
Types of Cat Nail Clippers
To help you decide which type of nail clipper is best for your particular cat, let’s take a look at the pros and cons of each in detail.
Pliers
This type of nail clipper is referred to as such because it looks and functions similar to pliers — if pliers had blades, anyway. Though plier-type clippers are generally easy to use, even those meant for cats can be a bit large. The size and the design make them great for cutting thick nails, but they may be a bit harder to maneuver around smaller nails than other types of clippers.
Luckily, the majority of pliers come with a safety guard. This is usually a small piece of metal set right behind the blades that prevents you from pushing the nail too far through the opening. This reduces the chance of cutting your cat’s quick and can be moved out of the way if you prefer not to use it.
Of course, safety guards aren’t foolproof. If your cat’s nails are somewhat short, you could still end up cutting the quick even with the safety guard on. While it can be helpful, you still have to use your best judgment when determining how much nail to cut off.
Scissors
To state the obvious, scissor-style clippers look like tiny scissors and are the perfect size for cats and kittens. They are easy to maneuver around the nail so you can always cut precisely where you want to.
While this style typically won’t work on thicker nails like those of dogs (aside from toy breeds), it can be used on other small mammals like rabbits, guinea pigs, chinchillas, and ferrets.
The compact size of these clippers makes them easy to store (and easy to misplace). Depending on the design of the handles, people with large hands or fingers can sometimes find this style uncomfortable to wield.
Guillotine
We haven’t included any guillotine clippers on our list, but we still thought it important to tell you more about them.
Guillotine clippers work by having a blade that slides out from the handle and cuts anything in its path (in this case, your cat’s nails). They usually have a hoop where you rest your pet’s nail before depressing the handles. Though the concept is similar to a real guillotine, the blade is moved by squeezing the handles rather than via gravity.
Unlike other styles of clippers, you have to take care with how you hold a guillotine. Specifically, you want to have the sharp side of the blade facing you. This means you can’t clip from any angle, so it’s harder to sneakily clip your cat’s nails while she’s asleep.
While a guillotine with sharp blades can do a great job at cutting your cat’s nails, they may not be the best option if your cat squirms a lot during a nail trim. With scissors, you can hold the blades against the nail before cutting, and pliers have safety guards. Guillotine clippers, however, don’t offer quite as much control.
One of the advantages of guillotine-style clippers is that many offer replaceable blades, so you won’t have to buy an entirely new product if the blades get dull. Instead, you simply follow the manufacturer’s instructions to remove the blade and put in a brand new one.
Grinders
While not technically a nail clipper, nail grinders are the perfect option for those of us who want to trim our pets’ nails at home but are nervous about cutting the quick. Grinders are essentially electric-powered files that rotate quickly to grind away a cat’s nails.
Because you’re not cutting through the nail but filing it away, your chances of drawing blood are a lot lower. You still do need to be careful though, as it is possible to file a nail too short and reach the quick that way.
While traditional nail clippers run the risk of crushing and splintering a nail (especially if the blades aren’t sharp), the same is not true of nail grinders. Nail grinders will remove sharp or jagged edges and leave the nail dull and smooth.
Grinders are also safe options for cats who are uncooperative or squirmy. Having your cat move its paw at the very moment you clip can be terrifying. If you’re lucky, nothing will have happened, but if you’re unlucky, you’ll have cut somewhere you didn’t want to. Grinders will not hurt your cat even if the grinder gets touched somewhere other than the nail.
Unfortunately, some cats will be just as afraid of nail grinders as nail clippers. Though grinders don’t sound loud to us, the noise can still be intimidating to a cat. If you decide to try a grinder on your cat, be sure to introduce it to them slowly, and get them used to the noise before you even touch it to the nail.
Nail Grinder Safety
Grinders create friction and thus heat, and holding them against a nail for too long can be uncomfortable or even painful. Avoid grinding for prolonged periods of time and use your fingers to check if the bit is getting hot.
Another thing to be careful of with grinders is long hair. It is easy for hair to get caught in the rotation of the tool leading to a potential nightmare. If hair gets caught, the situation is just going to get worse until you can turn the device off and attempt to remove the bit from the tool and then from your cat’s hair.
To prevent this, trim long hair away from the paws. You can also pull a nylon stocking over the paw and then push the claws through it, keeping any hair contained. Some grinders come with a cap that has small openings for the nails, and this can reduce the likelihood of such an accident.
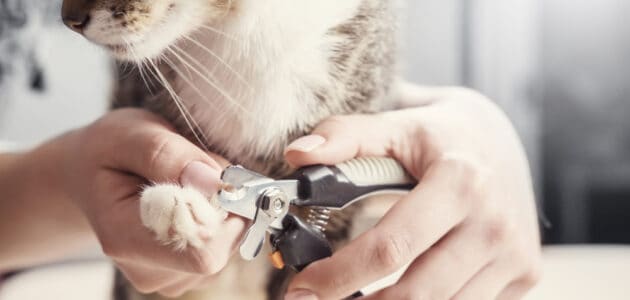
How to Safely Trim Your Cat’s Nails
We can all understand the importance of trimming nails, but doing it ourselves can be somewhat daunting, especially if our cats aren’t the most cooperative. Nail trimming can be so nerve-wracking that we’d rather pay someone else to do it. This can get expensive, though, so let’s talk about how to safely cut the cat’s claws.
The Basics
Here are the basic steps to trimming a cat’s nails:
- Find and subdue your cat. It may be helpful to have another person hold the cat while you trim.
- Push your cat’s claws out of their sheaths so they are fully visible. You can do this by gently pressing your index finger down behind the nail while simultaneously pushing on the paw pad with your thumb.
- Clip one nail at a time; avoid cutting the pink part of the nail, which is a blood vessel called the quick.
Seems simple, doesn’t it? But we all know it isn’t so easy! Let’s talk about what to do if your cat is difficult.
The Towel Wrap for Scaredy-Cats
It’s all too common for cats to freak out when they see the nail clippers nearing their feet. The act of clipping a nail is pretty simple, but many cats know how to turn the procedure into your worst nightmare. To make things easier for you, especially if you don’t have someone else to help you, you can turn your cat into a burrito.
- Spread a towel out and place your cat on top of it so that there is plenty of fabric on each side of her. Make sure she is laying down.
- Fold a bit of towel over to cover her front paws.
- Fold one side of the towel over your cat’s back. Then, take the remaining fabric on the other side and wrap it around your cat like a burrito. For cats that are especially panicked or aggressive, you can even cover their heads.
- Take each paw out one at a time and trim the nails. Give your cat breaks as needed.
- Release your cat from the towel and give her some treats.
This trick also works with a blanket, but a towel may be a little easier to manage since there is less fabric involved.
Counterconditioning
While wrapping your cat up like a burrito or sneakily clipping a nail while she sleeps are solid tactics, they do not address the root of the problem, which is ultimately fear. Cats that had negative experiences or were never socialized to the clippers as kittens are likely to avoid nail trims with all their might.
Luckily, cats can be counterconditioned. Counterconditioning is the act of changing your cat’s emotional response to a certain stimulus — in this case, the nail clipper. It can’t be done overnight, but if you’re willing to put in the effort, then you can eventually have a cat who tolerates a nail trim.
The basics of counter conditioning involve pairing the negative stimulus (the clippers) with a positive one (your cat’s favorite toy or treat). With counter conditioning, you want to start small and work your way up to actually clipping the nail.
For instance, the first step would be to take the nail clippers out, give your cat a treat, and put them away. That’s it. This would be repeated until your cat no longer shows any fear response toward the clippers. From here, you’d move on to holding the clippers in your hand, to moving them toward your cat, to touching them to your cat, all in small increments.
There are plenty of resources available online to help you learn more about counterconditioning if you think it could be helpful to you and your cat.
Other Nail Trimming Tips and Tricks
- Use olive oil on your cat’s nail to make the quick more visible.
- Press your finger on your cat’s toe while clipping a piece of spaghetti and feeding them a treat to help get her used to the noise the clippers make.
- Give your cat treats throughout the nail trim to bring something positive to the experience.
- Handle your cat’s paws frequently and use treats to make it positive. Nail trims will be a bit easier if your cat is used to having her paws handled.
Nail Trimming FAQs
How Often Should I Trim My Cat’s Nails?
How often you trim your cat’s nails will depend on your cat. If your cat goes outdoors or enjoys using scratching posts, then her nails may stay dull longer.
Generally, you should trim your cat’s nails every 10 days to two weeks. If you can see your cat’s nails even when they’re sheathed, then she’s definitely due for a cut.
How Do I Identify the Quick?
Many cat’s nails are pale in color and the quick is relatively easy to see. The quick is pink in color and is located near the innermost part of the nail.
What Should I Do if I Accidentally Cut the Quick?
You should have styptic powder on hand in case of accidents as applying it to the nail will help stop the bleeding. In a pinch, you can also use cornstarch.
What Should I Do if My Cat’s Nails Are Black?
If your cat’s nails are black and you cannot see the quick, go slowly and trim only a little at a time. Be sure to have styptic powder nearby. Using a nail grinder instead of cutters may be the best option for avoiding accidents.
Final Thoughts
Whether clipping your cat’s nails is a walk in the park or a march onto a battlefield, having a reliable tool is essential. A good tool can make the process quicker and more comfortable for you and your cat. Not only that, you’ll save a fair amount of money by doing it yourself. With the right tool, you’re sure to become a nail-clipping pro — if you aren’t already.